*****
I get so many questions about and compliments about our Mickey head tie dyed T-shirts that I thought it was about time I share some pictures of the process and some instructions with all of you. The first thing I do is cut the Mickey heads out using my Mickey Font Cricut cartridge. There is no rhyme or reason to the size that I cut them. I usually end up cutting multiple sizes and then place them on the t-shirt to see how it looks and then cut one bigger or smaller depending on how it looks. I always cut them out of black cardstock so I can see the outline of the paper good through the inside of the t-shirt.

Once the cut out of the ears is placed inside the shirt and centered where I want it, I just take a pencil and trace around the Mickey.

I didn't take a picture of the next step in the process because it was kind of hard to take a picture while stitching. What you will want to use is waxed dental floss as your thread. It is important that it is waxed. You will want a good size length of floss threaded into your needle I don't think it really matters where you start the stitching, but I always start at the bottom of the Mickey head in the middle. For a clear and well defined Mickey head you will want to keep your stitches pretty tight and close together. I really wish I had a photo of this step for you so you could see it. When you get all away around the Mickey head and back where you started you will want to pull on the floss to gather your Mickey head and make it pucker up so it looks like this (below). Be careful not to pull too hard because you do not want the floss to break.

After you get it popped up from the shirt looking like the picture above you want to take thick rubber band(s) and wrap them tightly at the base of the Mickey head. It is important that none of the stitched area is under the rubberband. If stitching area gets wrapped in the rubberband, you will want to pull it out from underneath or you will not get a good border around your Mickey. On the adult shirts I usually use two rubberbands and on the kids only one. On the adult shirts the band width is probably about an inch and the kids maybe 1/2-3/4". It doesn't have to be an exact science...after all, it is your own personal artwork!

Once you have all your shirts stiched, puckered and banded you will want to soak them in soda ash. I have heard you can purchase this stuff in the laundry aisle at some grocery stores, but I for the life of me have never been able to find it in any around me! I usually buy a couple boxes of it by Tulip from M's or J's. I always soak mine overnight.
Once they are soaked you can squeeze out the excess water and then you want to lay them out on a flat surface with the Mickey head facing up like pictured below.


After you have it all flat with the Mickey head up you want to grab ahold of the Mickey head by the rubberband base and while holding the rest of the shirt still with your other hand you want to start twisting the Mickey head. You may need to adjust and straighten the shirt during your twisting.

Keep twisting and straightening...

....and twisiting

Basically your end goal when all the twisting and straightening is done is to have it so it looks like a giant cinnamon bun with a Mickey head sticking up out of it like shown below!

Then you want to take thin rubberbands and band the shirt to hold all the edges in the bun form.

Again...no exact science to this, but I usually use 3 rubberbands for the kids sizes and 4 rubberbands for the adult sizes.

It is important that you keep the Mickey head pulled up and out from underneath the other rubberbands. I usually put a rubberband around the outer edge of the circle part of the bun as well, but it is not mandatory. I just like knowing that all is being held in shape during the dying process.

These are the dyes that I used by Dylon and I was very happy with my color results. I have heard other people say that dyes by Jacquard give a very vibrant color, but I think you can only order those online.

I used ketchup and mustard containers from the dollar store for my dyes and just wrote on the outside of them what colors they were. The nozzles on these bottles made it easier to get down inside the folds of the bun which puts more color on the t-shirt. If you prefer more white to show, do not go as deep into the folds.

These were the easiest ones I made because they were our black and white shirts. All it required me to do was squirt it down with black all over!

The multi-colored ones were a little more complicated. One this particular one I wanted the Mickey head to be black so I held the shirt upside down with the Mickey head facing down as I carefully squirted the black dye onto it. Once I got it covered in black ink, I quickly and carefully wrapped it with a piece of plastic wrap and then rubberbanded around the bottom VERY TIGHTLY to hold the plastic in place and keep the black dye from dripping onto the rest of the shirt. Then I just picked part of the shirt to use the yellow dye on (including down in the folds) and the rest I added the red.

I followed the same kind of dying pattern on the bottom side of the bun, still making sure I was getting down inside the folds.

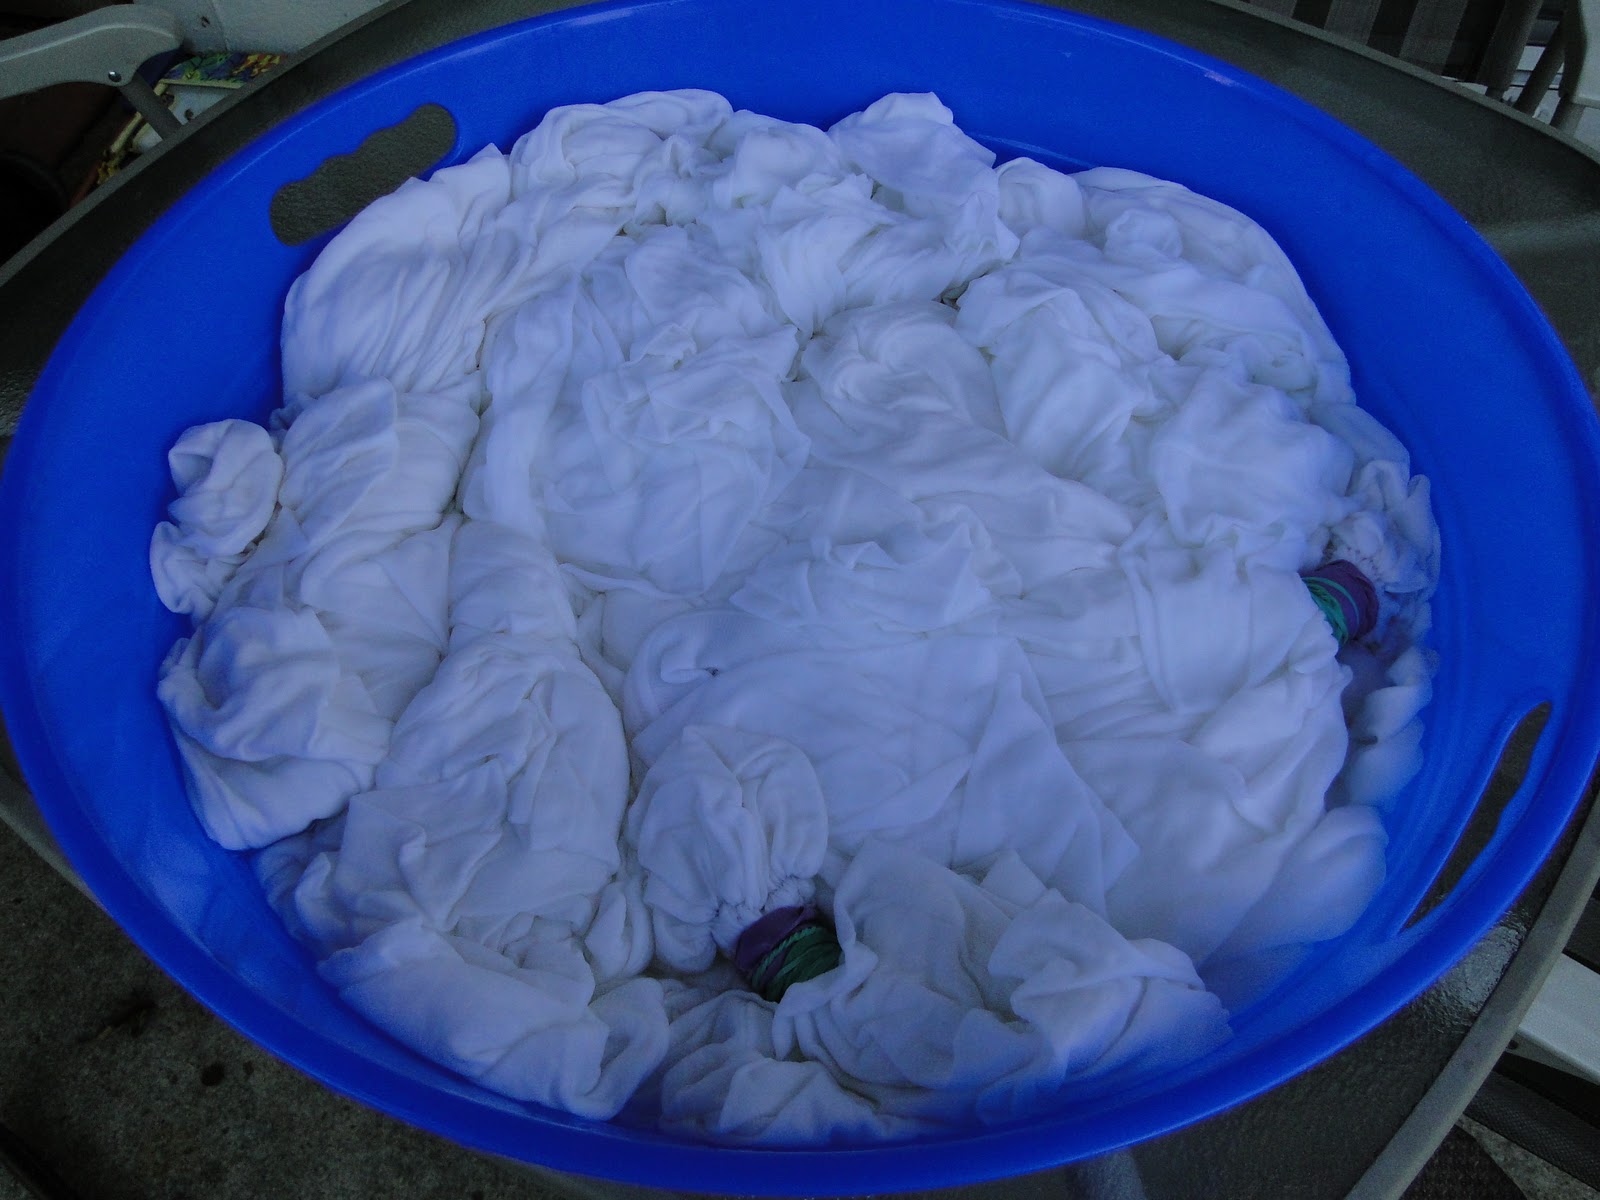
Once I had finished adding the dye I wrapped the entire shirt securely so the dye couldn't drip out onto any of the other shirts and placed them back in the big blue tub. The longer you let your t-shirts cure and set in the dye before washing...the better. You will want to give them at least 24 hours, but I usually like to let mine sit for 3 or 4 days.

Once you've let the dye set for the length of time you choose, you will want to unwrap the first layer of plastic wrap that is covering the entire shirt and rinse it thoroughly in cold running water. Once the water that is draining is running clear, go ahead and unwrap the Mickey head and rinse that under the running faucet. Once the entire shirt is rinsed thoroughly you are ready to remove the rubberbands and the stitching! Your next step is to run them through the washing machine on cold water cycle. I always wash my like sets of dyed shirts together for the first time without mixing them with the other sets. I usually do one wash and then run them through again with an old towel. The old towel will usually pick up any extra dye that isn't set into the material completely. I also do not put my tie dyed shirts into the dryer. I always put them onto a hanger and let them air dry.
Here are some pictures of our shirts that I made for our June 2010 WDW trip. I really need to get busy soon on some new ones for our trip later this summer!


I had to share two of our purple and yellow shirts - daytime shot....

...and night!

I hated these black and white shirts when I got them rinsed out. It was a lot more black that I expected or wanted....I wasn't even going to take them with us. My husband talked me into taking them and I'm so glad he did!!! This picture of our family in front of the Tree of Life at Disney's Animal Kingdom is one of my all time favorite pictures of us. Thanks Babe for being the voice of reason (if only this one time!)

I made myself a pink and orange Mickey T! Pink and orange is my absolute favorite color combo and I didn't think I could talk the boys into it! lol I kept it for one of our short park days and let the guys sport their Mickey spangled banner t's!

If I had a dollar for every person that stopped us and asked where we got our shirts I would be a rich woman and if I would have had extra T-shirts with me...I would be even richer! I loved how proud of our shirts my boys were. Usually before I could even respond Tanner or Parker would speak up and say "My Mom made them!" That alone made all the time spent making them well worth it!
I hope you have enjoyed my tutorial. For those of you who have been asking for so long...thank you for your patience, hope it was worth the wait! If you end up making some of you own, make sure to stop back by and let me know! I would love to see how yours turn out! Have a magical day!
Awesome tutorial. I really hope I take the time to make some before our June Disneyland trip. If I do I will definitely post pictures. Hugs- Glora
ReplyDeleteGreat tutorial. Your shirts are absolutely amazing. Thanks so much for the tutorial.
ReplyDeletebhoward at kci dot net
Wow, Melissa, that's a really great shirt!!! And you did a wonderful tutorial, but that's waaaaay outta my realm of crafting!!! LOL!!!
ReplyDeleteThanks for showing just how you made these awesome shirts!!!
ReplyDeleteThanks so much for inviting me into the Disney Pixar Blog Hop!!! The comments I have on my blog (close to 200) were so inspiring!
Disney Hugs!!
Lori
Love, love, love these shirts! While reading it though, I'm wondering what the Soda ash does and how it would affect the shirts if this step was skipped? Thank you so much for taking the time to put together this awesome tutorial!
ReplyDeleteYour are a very clever lady! what a lucky family.
ReplyDeleteGreat details in the tutorial. I am going to give it a try.
ReplyDeleteWhat a fabulous tutorial....I love all the different colors you chose. What a super tradition for your Disney vacations.
ReplyDeletesmiles...Tammy
I love, love, love your shirts! The black and white ones are just as cute as the other ones but I think my favorite are the black mickeys with red and yellow.
ReplyDeleteMelissa . . . did you come up with this idea all on your own? Seriously, if you could set up a stand outside one of the parks, you could pay for your next trip by selling those shirts . . . they are great! By the way, my daughter wants one now.
ReplyDeleteFINALLY!!! lol Great job on the shirts! Thanks for the instructions!
ReplyDeleteWOW! Thanks for sharing that AWESOME picture tutorial. Your shirts are amazing!!
ReplyDeleteDefinitely the best pictures and shirts. I am wearing my Disney shirt (store bought) right now, but it doesn't compare to yours.
ReplyDeleteAwesome shirts,
Georgiana
My husband is currently in the process up updating our tie-dye attire! We are an "amusement park family" and I always dress my 3 boys in tie-dye when we go (easier to keep track of them)! We are planning a trip to WDW in 2013 and these instructions are AWESOME! Thank you for sharing your great idea!
ReplyDeleteFantastic!!!
ReplyDeleteJanice
www.cricutconfessions.com
WOW - great tutorial!! The shirts are just magical! I bet it always a surprise to see how they turn out. They are beautiful! The boys are so lucky to have such a talented mom, who loves them so much!!
ReplyDeleteThanks for sharing!!
Kim
Thank you so much Melissa! I'm definitely going to make some of these!
ReplyDeleteLove your shirts. Your tutorial is awesome. What agreat idea. TFS
ReplyDeleteWOW.. I am so impressed. They are just AWESOME and what a lot of work that goes into them. hugs
ReplyDeleteThis is fabulous!!! Oh how I love these shirts you made.
ReplyDeleteYour blog is adorable!
Wanted to thank you for your nice comment and for sharing my candy on your side bar.
Good Luck to you sweetie
Thanks for sharing! Love love love the shirts!
ReplyDeleteI love those shirts!!!! Thanks for the tutorial!!!
ReplyDeleteWhen will one be up for a "give away"???
Kaye
After you told us yesterday that you were going to post this I couldn't wait! Thank you so much!!! And thanks again for letting me be in the hop. I told Shawn I think y'all have the great makings for a regular challenge idea.
ReplyDeleteThese are awesome! I love that you made so many different colors!
ReplyDeleteSo cute! What a great idea :)
ReplyDeleteMaybe next time you wear them you should hand out cards and take custom orders. ;) I <3 them and they look fab!!
ReplyDeleteI was thinking of the colors I would use as I was reading your instructions, and low and behold ... there they were! Red, yellow and black! Of course! :) I can't wait to try my hand at these shirts! Need to get the Disney cart first and then I'm off and running! Thank you so much for sharing!
ReplyDeleteAll the shirts look great and I think the black ones look good too. You should make them and sell them.
ReplyDeleteSell them through Etsy.com
Chris.Pickul@hotmail.com
http://pickulblog.blogspot.com/
Wow these are awesome and I love that you showed us how you did. TFS
ReplyDeleteWow, your tutorial is A-M-A-Z-I-N-G though I don't know if I have that much patience to give it a whirl. Like many of your other commenters, I'd just rather buy one as needed. I likely shouldn't admit this, but I've been to Disney World and Disneyland so many times that I'm kinda Disney'ed out. At least, until my granddaughter is old enough to go and appreciate it -- so give me about 4 years and I'll be back looking for T-shirts to take with!!
ReplyDeleteI LOVED being part of the Disney Pixar Blog Hop with you and Shawn. I got an unbelievable amount of traffic on my site because of it, and 203 comments!! WHEW!
NOW FOR THE REALLY, REALLY GOOD NEWS.... can you believe I held it back for this long!?
Guess what?! YOU WON BLOG CANDY at my blog, when you posted about my EmbEllies Card Pins (day before the Hop). THAT'S RIGHT, you won 6 of these cutie-pie pins!! I'd love to get them out to you ASAP, so please e-mail me your addy. Go over to my blog to check out your congrats message!
THANK YOU AGAIN FOR ALL YOU DO!
Ellen ♥ CardMonkey
www.cardmonkey-business.blogspot.com
E-mail: cardmonkey@comcast.net
WOW!!!First off, how fun seeing you and the family!!.You have such talent that you should be selling your shirts and no doubt be making enough money to visit Disney more often..lol..I live like 15 miles from Disney and would love to meet you on one of your trips. Keep up the awesome work and as always, thank you for sharing your talent with us at Betty Bee's Buzz!!
ReplyDeleteLove the tutorial on dying the shirts!! I have all ways been afraid to make a tie dye shirt, but who knows maybe now I might just give it a shot!
ReplyDeleteAlso congrats on making it to number 5!!! Thats Awesome:)
~Kim
First of all SUPER job on the tshirts! They turned out great. Now for maybe a stupid question but I have been everywhere to try to find a ketchup and mustard bottles and I can't find them! What dollar store are you getting them from? I'm in Florida and I just can't seem to find them. Email me if you would dsc105@live.com
ReplyDeleteHugs,
Deb
PS I live reallly close to the mouse!
GREAT Tutorial!!!!!!
ReplyDeleteI am so going to try this, thank you thank you thank you......
I have admired your shirts since I first saw them!! SO creative!! Your tutorial is superb (even I could do this!!), BUT... I wanna know... Do you sell them anywhere? Seems to me, you should!! :)
ReplyDeleteThanks for always sharing your amazing talent!! I LOVE visiting your blog!! :)
Amy :) at www.lovetocrop.com
I absolutely LOVE, LOVE, LOVE your t-shirts! Thank you so much for sharing! My family and I are going this July for the 1st time and I was wondering since you go so often if you have any inside advice you could give to a newbie! Please feel free to email me. Thanks!
ReplyDeleteKimmie
kakrnach at yahoo dot com
I've done those before too - there's even a post on my blog about it from about a year ago. Yours turned out REALLY good!!! Weren't they fun to make?!
ReplyDeleteGlad I found you through the Disney hop. I'm looking forward to reading more of your posts!
~Jodi
www.magicalmouseschoolhouse.com, where Disney IS school
Great tutorial!! I'm gonna post a link to this on my Facebook page & twitter, so others can make shirts. Love it!! I love all the photos of your family even more! So cool!
ReplyDeletehttp://www.facebook.com/magicaldayswiththemouse
These are wicked! They kinda look like big mickey fireworks! :D
ReplyDeleteThanks for sharing this tutorial! I bought the supplies to make tie dye shirts this summer with my boys. I thought it would be fun to wear matching shirts when we go on "field trips" or family reunions. I'm excited to try this technique. We probably won't use Mickey but I'll think of something we all like ;)
ReplyDeleteVery Cool! Looks like it takes a lot of work, we may try it some day.
ReplyDeleteLisa
This comment has been removed by the author.
ReplyDeleteOMG! I am so excited, I really want to make some of these. Thank you so much! Where did you find your dye at?
ReplyDeleteAlso, my husband said that alot of times Lumbar Yards or Pool Supply companies will carry soda ash.
Thanks so much for the tutorial! I'm going to start making my shirts soon for our summer trip! Your shirts look great. I may have to do the black and white ones for Animal Kingdom too.
ReplyDeleteOh how awesome. I'm thinking a few shirts for our family vaca to DL, would be so much fun. So little time!
ReplyDeleteJeanine
I don't think it was your family we saw at Disney World the other day but we did see several families who did this same thing and it is a wonderful idea. I did stop one of the family members and inquire as to which store they purchased the shirt and one of the children said, "we didn't, we make them".....my son is still asking about them and wants one. What you could do is make them and sell them on Ebay. You could take orders for them. I know I would buy one. Thanks for posting this, my son and I will probably give it a try since he really does want one and by the way, The black one is my favorite....your husband was on the money with this one :)
ReplyDeleteWe tried making these for the first time last night. We got no white outline around the Mickey head. It turned into a big area sort of shaped like Mickey that just ran into the rest of the tie dye. Any advice on what the common mistakes are? Thanks!!
ReplyDeleteLove the shirts! I'm gonna have to make some for our Disney trip in the spring. How much dye do you use and for how many shirts? Thanks!
ReplyDeleteTHANK YOU for your extensive detail on how to do these shirts. I posted pics of the shirts I did and headed them to your Blog. Which is a great Blog by the way,
ReplyDeleteThanks Jen! What is your blog address? I would love to see your shirts!
ReplyDeleteThanks 4 sharing this tutorial! I can't wait 2 try & make 1! Have u ever tried other shapes besides Mickey's head? And, can u purchase those Dylon colors at Michael's? (I love the black~never seen that color tye-dye b4!) I don't have a Joanne's near me. Thanks again 4 sharing~u r very creative & inspiring! Once I make 1 of these~I will send try 2 send u some pics! Take care & have a safe & wonderful trip!
ReplyDeletewow, this is awesome. I was at WDW 2 weeks ago with my sister, wish I'd had a shirt like this. maybe next year.
ReplyDeletethank you so much ! Love your blog !
ReplyDeleteLove the shirts. I have a question about the dye though. When putting the powder dye into the bottles, how much do you use? Do you use the entire packet in the bottle or just pour some in? Thanks.
ReplyDeleteGreat instructions! Which Dylon dye do you use? I saw some at the store but the instruction on the packet called for mixing in large buckets, are these the same dyes you use in bottles?
ReplyDeleteThank you for being so generous in sharing how you make these shirts :o) I really appreciate it!
ReplyDeleteI too am married to my high school sweetheart, have two boys and we are disney fanatics as well!!!
Thanks for sharing this tutorial. Its really interesting.All tie dye shirts
ReplyDeleteare looking cool.Selection of colours is really nice.
I googled "Mickey Tie-Dye" and found this. You are amazing!! And, what a sweet looking family. Hope to run into you sometime at WDW ;)
ReplyDeleteI don't think I could read those carefully laid out instructions without stopping by to say AWESOME!! & THANK YOU!!! I really appreciate you taking the time to put these online where regular no talent folk like me can try their hand at doing something so cool for their next trip! IF they turn out as fabulous as yours did, I plan on giving you ALL the credit!! Thank you so much!!
ReplyDeleteWe were in WDW last week and I saw a few of these shirts around...never thought to look it up online until I asked a family. Your black and white shirts look awesome...in fact, they all do! I can't wait to do these for and with my family.
ReplyDeleteI bought the same type of dye that you had in this tutorial, I was wondering how exactly you mix yours?
ReplyDeleteThank you for sharing your talent and this tutorial with us! I found this post on Pinterest. You are my very first Pinterest project and it was a success! I am going on a Disney Cruise and wanted to take a second cover up with me for the pool. All the ones on the market are outrageously priced (being that it's fall doesn't help either!) Anyway, I purchased two tshirts that were few sizes larger and made some of these awesome tie-dye shirts to use for poolside time! Thanks again!
ReplyDeleteThank you so much for your fabulous instructions! ... We followed them and made some great shirts .... We got lots of compliments at the Disney World Parks ... and of course, gave you the credit! ... In Canada, our dye selection is somewhat limited ... So we purchased some Dylon dye during our trip ... Do you mix it as per the package's instructions ... If so, do you really use all 4 cups of liquid on one Adult shirt with the squirt bottles? Thanks in advance for any help you can provide ... And thank you again from the bottom of our Mickey-hearts for making our vacation extra special!!
ReplyDeleteAwesome thoughts and idea to manufacture the mickey t-shirts.Kids will love very much and it is good design.design a tshirt
ReplyDeleteSimply brilliant job. I love this tutorial surely am going to do this with my white t-shirt for my baby.
ReplyDeleteI just LOVE them. I tried to make one today but the mouse did not come out good. Could you tell me how you stitched it? How far apart and do you have a photo of that step? Thank you so much!
ReplyDeleteMy mouse didn't come out as well either. Just a blob kinda shaped like a mouse. Any tips?
ReplyDeleteHello,
ReplyDeleteMickey Mouse head Tie Dyed T-shirts are always my favorite and look different than other. In a simple, it's always evergreen type of t-shirts. If are you looking for Premium Zip Hoodie then, it's better to visit our website and get the details.
I tried this on my tshirt and got results but not like that. I need more practice, but these tips and idea's are great thanks again.
ReplyDeleteI love these Mickey tees! Especially the black and pink. Wonderful!
ReplyDeleteI attempted these shirts this weekend. Attempted being the word. I have only unwrapped half of them. Only 1 of the 6 can you actually tell it is Mickey's head. Have no idea what I did wrong. I read somewhere to try going around with bleach if it didn't come through well. Tried that with no luck. Our next plan of action will be fabric paint fanned out from around a Mickey template. I am very disappointed after working on these for over 4 hours.
ReplyDeleteHi i just found your page through pintrest and love your tees. I am going to Disney Paris in the summer with my family and am going to totally make some of your amazing tees.
ReplyDeleteThanks for sharing.
This comment has been removed by the author.
ReplyDeleteAs Summer is heating up Tees should be your essential part of your wardrobe that will make you feel comfortable and cool in summers. I ordered Spaze Apparel 6051 Tee last week and it looks so classy and it is cheapest I can find.
ReplyDeleteThis is stunning! I'm passed up the type with this astounding.I've perused a great deal of articles, this really is one of the best ones that I've perused. Carry on providing more articles this way.tie dye
ReplyDeleteCustom T-Shirt Design Services. Hire t shirt logo designer online expert services and get your custom t-shirt design done and delivered remotely online.
ReplyDelete