Music washes away from the soul the dust of everyday life....


Get a playlist! Standalone player Get Ringtones

Thursday, March 31, 2011

Have had better days...

Good evening everyone.  I'm sorry I never made it back to post a card today...I didn't finish it.  I wasn't feeling too hot this morning, but it got much worse as the day progressed.  It has been a very long time since I've had a bad sinus headache like the one I had today.  At first I wasn't even sure that was all it was.  My stomach was feeling really funky and I was worried I was coming down with the horrible flu that has been running through the boys school.  I still have the horrible headache, but thankfully my stomach seems to have settled so I'm crossing my fingers and toes that it is only a sinus thing.  Tomorrow my husband flies home from China.  He has only been home one week since January 1st and it's been 2 months straight since he was home last.  I was so upset that I was getting sick and just in time for his homecoming.  All I want to do is kiss and hug him and if I had come down with a bug, then that wasn't going to be happening.  :-(  There is a possibility it still won't if this turns out to be more than sinus, but I'm praying to God it isn't!

Some of the goodies I ordered this week arrived today!  Take a look at this gorgeous crinkle ribbon I got from My Craft Spot.  I cannot wait to use it! 


My big order of Action Wobbles arrived as well!  These are what I used on the Owl card I made that I loved so much!  That card went in the lot of cards I donated for the school auction (that my friend Kim won!), now that I have more Action Wobbles I can make another like it (well not JUST like it)!


...and look what Kimberly at My Craft Spot added to my package for me to use as a giveaway at our next Disney/Pixar Blog Hop!!! 

So excited that I am going to get to share some of this ribbon with one of my lucky followers!  I have a few other goodies that are going to be up for grabs as well!

Even though I wasn't feeling 100%....heck I don't think I'm even 30% tonight....I had to help Tanner finish up his animal made from recycling for his assingment that is due tomorrow.  We've been working on him all week in short little sessions, putting together pieces and layers of paint.  Tonight we finished him up and when he was finished Tanner said "Mom, you need to put him on your blog!"  So tomorrow...Tanner will be my guest designer on my blog showing off his pink piggy! 

Jim is on the plane as I type this and on his way home to us!  15 hours and 15 minutes more and he should be home.  Cannot wait. 


April Showers Blog Hop this weekend!

Don't forget to come back Saturday morning for the 2 day April Showers Blog Hop!  Not sure yet what my blog candy is going to be, but rest assured that blog candy there will be!!! 


I am going to be a stop on this hop...as well as any of the other hops I have on my sidebar!  So just come back here on the day of the hops and I will have the lineup and starting blog for you.


I didn't finish my card for today yet so I will be back later to post it.  Lots to do today!  My hubby will be home in 30 hours and 15 minutes!!!  ...not that I'm counting or anything.  :)  


Wednesday, March 30, 2011

Purple Pumpkin giveaway!!!

Hurry over to Sam's blog Purple Pumpkin and get in on her embellishment giveaway!  She's the same sweet  lady who donated the spotty button set of embellishments for the last Disney/Pixar blog hop and her stuff is beautiful!!!  It doesn't give me any extra chances or anything like that, but if you go to sign up for her giveaway will you please leave in your message that you were sent by me.  I just want Sam to know that supporting Disney Dreamer Designs means that the followers of Disney Dreamer Designs will support her too! 

Please go sign up to be a follower and leave some blog love for Sam for your chance to win!  She has generously agreed to sponsor another one of our Disney/Pixar blog hops so please go by and support her!

Look at this yummy goodness that she has up for grabs on her blog today!


I was the readers pick!

Thanks to all of you who voted for my Nemo layout!  I was the readers pick at Patches of Pink!!! 


Not only did my Nemo layout win, but my "Have a tree-mendous day!" card came in second!!!  Thank you so much for your support! 


Good friends are cheaper than therapy!

I made these cards last week for a couple of friends (I couldn't post them til after I gave them to them!) that have been wonderful enough to lend their shoulders to me lately.  They have been there to listen to me whine and complain... make me laugh and smile... and wipe away my tears.  They have also been my support system filling in on all of the school activities that my dear husband normally assists me with.  My wonderful husband has been out of the country for a couple of months for work and we all miss him terribly!  We are in the home stretch and he will be home in just TWO MORE DAYS!!!!  I can tell you that without my friends (and Skype)...I would not have made it through these past two months.  My hat goes off to all of the single mothers and all of the families who have a loved ones serving our country overseas.  It is hard to live the way that we have been and I am thankful to God that this is only a temporary thing in our life.  I wanted to make them each a card and add a little sweet treat of a Tim Horton's gift card inside (both of these ladies support my Tim Horton's butter caramel Iced Capp addiction on a regular basis).  I totally scraplifted these cards from a card that I was sent about a year ago from a fellow crafter.  I figured since I was doing two similar that I would cut enough ice cream cones from my scraps to do some extras to have on hand.  I just added a few more things to bling my version up a bit with some liquid glass, Stickles and I can't seem to make a card lately without turning on the sewing machine! 


The patterned papers I used for these cards were all from my stash of scraps from Bo Bunny and DCWV.  The ice cream cone cut is from the Sweet Treats Cricut cartridge at 4 3/4".  Martha Stewart glitter pen and fruit punch Stickles were used on the strawberry and the bling gems are by EK Success.  You can't tell at all from the picture, but I used CTMH liquid glass on the ice cream.   The sentiment stamp is from Inkadinkado.


The day I gave these cards to the ladies I made them for...we had Chinese takeout for dinner and this was the fortune inside of my cookie.  


This couldn't be more true.  I am very blessed to have such a wonderful support system around me and I consider all of you that stop by here regularly and leave me such sweet comments to be among those friends!  It takes so little to turn a frown upside down and you have no clue how often I turn to my crafting and my blog to lift my soul.  Hope you have a wonderful Wednesday!  I will be joining Parker and his classmates for a field trip to the symphony!  Can't wait! 

Tuesday, March 29, 2011

You need to go to my SIL's blog!

Go now!  Do not pass go!  Do not collect $200 dollars!  I am LOVING the Disney Easter card that she just posted and I'm soooooo happy that it's coming to my house!!! 


Here is just a little sneak peak to get you over there! 


A little birdie told me....

Well I here I am...tired, but still awake and unable to fall asleep.  I've never required a lot of sleep, but some would be nice to help me get through the days! lol  I figured as long as I was up I might as well go ahead and get my post for the day posted!  It is already Tuesday and if I fell asleep at this very moment I might be able to get in 4 hours of sleep, but I will most likely be lucky to get 3.  Something has to give at some point...

So for todays card...

I fell in love with this Heidi Grace paper last week at Joanns and I had to bring it home with me!  HAD to!  I have card visions for every single page in the stack! 

For this card I used the bird and limb cut from the Live Simply Cricut Lite cartridge cut at 3 1/2".  The bird is cut from the back side of this same paper that I used for the card background.  The ribbon and bow are by Offray and I topped the bow with a square button from my stash.  The sentiment stamp is by Three Bugs in a Rug and I used Dew Drop Brilliance in Mediterranean Blue ink.  I couldn't resist putting one of the googly eyes with eyelids and eyelashes on it!


I am entering this card into the following challenges: 

I have also linked this up for the Patches of Pink Thursday Linking Party!


It is going to be a good week for me!  I expect to be hearing the doorbell a lot!  I got the shipping notification today from Marlo at Contain Ya Crafts that my Scrap N Easel is on it's way!!!  I have some Imaginisce blog candy that I won awhile back headed my way!  I won two things this weekend on blog hops including the beautiful handmade decorative pins from Ellen at Card Monkey and a Stampin' Up set of stamps called Punch Bunch from Nicolette at Beyond Scrapin!  Plus....I did just a wee bit of online shopping Saturday for some Action Wobbles, Bakers Twine and some gorgeous hand dyed crinkle ribbon from Kim at My Craft Spot (see blinkie on sidebar) who is also being kind enough to send along some of her beautiful ribbon in Disney colors for a giveaway during the next Disney/Pixar blog hop!!  Oh...and I have TWO sets of stamps from Sarah at Pink Cricut on the way that I had to have (who will also be sponsoring the next Disney/Pixar blog hop!!!).  FUN STUFF!!  

Busy day today filled with stuff at the school and a vet appointment for Max.  I won't get to create until later tonight after the boys go to bed.  Hope you all have a terrific Tuesday!!!  Thank you so much to all of you that stopped by Patches of Pink to vote for me yesterday!  It looks like the voting is still open until noon today, but both my card and layout are doing great at the moment!  

Monday, March 28, 2011

Help Wendy celebrate 1500 followers!!!

My friend Wendy the Bling Queen has just passed 1500 followers!  Wahoooo!!!  Congratulations Wendy!  She has a great stash of blog candy up for grabs so go check out her blog, become a follower if you aren't already and leave her a comment letting her know that Melissa at Disney Dreamer Designs sent you!  That way you get an entry to win her blog candy and so do I! 


So hurry on over and leave Wendy some blog love!  Don't forget to tell her I sent you!! 

Did someone say chocolate bunnies?

I'm back with more horrible pictures!  lol  Seriously...I'm so ready for the summer sun!  This bunny is cut out of a very rich chocolate brown paper and here it looks black!  Oh well...I digress.

The bunny is cut from the Celebrate With Flourish Cricut Lite cartridge.  The actual design of the bunny is a little more squatty and I wanted it to look more like the chocolate Easter bunnies that you buy in the store.  I unlinked the height/width proportion button on my Gypsy so I could adjust (stretch) the bunny to look more like I wanted.  When I finished the readings on my Gypsy for Width was 4.11 and the Height was 6.20.  The brown layer of the bunny is cut from Bazzill and the under layer to show through as the flourish is cut from a pastel yellow piece of pearlescent Colorbok.  It doesn't look sparkly at all in this picture however...


The patterned background paper is from Sassafrass, the stamped sentiment is Studio G and the beautiful plaid ribbon is by Ribbon Boutique.   I inked around the edges of the yellow strip of paper that I used to put the sentiment on with the same brown Colorbox Cat's Eye ink that I used for the sentiment.

So what do you think?  Does it look good enough to eat?  hee hee 

I am entering this card in the tic-tac-toe challenge over at The Paper Variety  and for Mary's bunny challenge over at Cardz TV .  I am so thankful for each and every one of my followers and your comments truly do mean the world to me!  A little blog love can go a long way!  <3

Please don't forget to stop by and check out my two projects that I entered in the contest over at Patches of Pink!  Voting is TODAY ONLY!  Thank you! 


WINNERS of the Disney/Pixar Blog Hop!!!!

WOW!  WOW!  WOW!  Seriously...that is all I keep thinking when I look at the wonderful comments left by each and every one of you this weekend!  You truly touched my heart and will never know how much I appreciate all of your kindness!  I ended up with 344 eligible comments for this blog candy!  Another WOW! 

I'm so excited to be announcing the FIVE winners from the Disney/Pixar Blog Hop over the weekend!  If you haven't noticed already...I have a NEW Disney/Pixar Blog Hop button on my sidebar for our SECOND Disney/Pixar Blog Hop coming up on April 30th!  I'm already thinking about what I want to create! 

...and now without further ado!  Here are the winners!

Oh wait...maybe just a little further ado...

I wanted to explain something before I announce the winners.  I've never had this situation before because this is the first time that I've had a giveaway over 200 comments using the pre-numbered comments.  Once numbered comments reach 200, they start over at 1 so comment #201 on my Disney/Pixar Blog Hop post will show as "1".  Comment #268 would show as comment #68, so on and so forth.  SO.....  if comment #24 comes up on random org and you are REALLY comment #224, I am sorry, but you are not the winner.  If you look at all of the comments listed you will notice with the date and times who is at the start of the list at #1 and who was the last qualified comment at #344 (144).  I didn't realize it did this, but I'm telling you it makes it much easier than having to count out all the numbers and then double check to make sure I have the right person!  This process took long enough without having to count!  NOW....  on with the show!  :)


Winner of the Pixar Cars Cricut Cartridge is...


 Glora said...
I'm not sure why I wasn't following you sooner. You know I'm a Disney lover too. I LOVE your Nemo LO and your card and Castle LO - fab. Such a fun hop and thanks for a chance at such fun Disney stuff. Hugs- Glora

Congratulations Glora!  Stop by Glora's blog and check her out!  >>> Glora's Crafts


Winner of the fabulous, custom made Minnie Mouse Cricut Expression Cozy donated by Kathy from Kathy's Cozies is...


 tandkparker said...
What an awesome Disney day!! I loved the entire bloghop - I've learned so much!! I love your Nemo layout!! Gotta get me some Disney carts! Can't wait to see how to pens work in person - maybe at the next scrapbook weekend. Thanks for having so many blogcandys - hopefully I might be a winner!!  Can't wait to see the t-shirt tomorrow!! Have a great weekend. Kim

Congratulations Kim!  Kim was also the winner of my card set that I donated for our school auction last weekend!  Looks like she's on a lucky streak!  I would love to send you off to Kim's blog, but she doesn't have one!  Which is a shame because she makes some fabulous layouts and cards!  She is also a great mom and Girl Scout leader with lots to share with the crafting community!  Come on Kim...jump on the blogging bus!  Kaye did it, so can you!!! 


Winner of the gorgeous assortment of handmade embellishments generously donated by Sam at Purple Pumpkin Crafts is...


Kaye said...
I LOVE the "I'm all ears" card!!! TOO cute. The Magic Kingdom cover is unbelievable!!! Make me a winner!!!  Kaye

CONGRATULATIONS Kaye!  Winner!  Winner!  Chicken Dinner! Go visit Kaye at her new blog!  She is super creative and happens to be a very good friend of mine!  >>> Yesterday's Tomorrow 2011

I am SO jealous that she won these fabulous embellishments!  Maybe she will feel some guilty and toss one of the pretty red polka dot buttons my way!  hee hee


Winner of the large assortment of paper and embellishments generously donated by Reminisce is...


 Lori Apgar said...
Oh My WOW!!! You have outdone yourself girl!!!! Love the Nemo layout AND the castle AND the card!!! Thank you so much for including me in this hop!!!! AND you know I will be back tomorrow to see your tie die tutorial!!!!  Hugs, Lori


Congrats Lori!  Now... Lori was not only part of our hop AND a huge Disney fanatic like myself....but she has won blog candy from me before, has a son named Tanner like myself AND already won Amy's blog candy from Chomas Creations for this blog hop!!!  I think Lori needs to go buy a lottery ticket!!! 

Now for the final winner from this blog hop.  The winner of the small Reminisce package is...


 Brandy said...
I love love this! I need inspiration cause I am just starting my Disney album and need all the ideas I can get! THANKS SO MUCH!  Brandy

Congratulations Brandy!  Sounds like this blog candy package will be put to very good use! 


Congratulations to all the winners and thank you once again for all of you who stopped by, leaving such heart warming comments and making our first Disney/Pixar Blog Hop (but certainly not our last!!!!) such an overwhelming success!!!  I think I have contact information for all of the winners.  I will be contacting you all shortly and you will have one week to respond with your mailing information so I can get the things out to you that are coming from my house and get the addresses to the other sponsors who are sending their prizes individually. 

Don't forget to check out this post from earlier!  >>>> Patches of Pink contest


I'm competing over at Patches of Pink!

Okay my fellow crafty friends...I have my Nemo layout and my Have a Tree-mendous Day card on display and competing over at the Patches of Pink blog and voting is TODAY only! 

If you liked this...


OR this....


...and would like to cast your vote for either of them I would really appreciate it!  Please go here >>> Patches of Pink and check it out!  Remember voting is TODAY ONLY! 

I have just finished getting all of the winners for the Disney/Pixar Blog Hop candy via Random Org and taken all of the pictures.  Just need to get the pictures uploaded and finish the post and then I will be back!  


I was #5 on the Cricut Top 40 list!!!


WOW!  What a hop!  Our first ever (but happy to announce, not our last!!!) Disney/Pixar Blog Hop was even bigger and more successful than we could have possibly imagined!  I want to thank each and every one of you for stopping by my blog and for hopping along to all of the other ladies that participated.  I was overwhelmed by all of your heartfelt comments that you left for me!  I love creating, I love Disney and I love sharing.  Comments like the ones that were left for me this past weekend validates the amount of time, energy and heart & soul that goes into my blog.  I truly look forward to posting and reading your comments and then getting the chance to go out and visit all of your blogs. 

Saturday was so much fun watching the numbers climb on the Cricut Top 40 and SCAL Top 40 lists!  LOOK!  I made it to #5 on the Cricut Top 40!  NUMBER 5!!!!!  I couldn't believe it!  I've been in the Top 40 many times before, but never #5!  Never even in the top 10 before Saturday!  There aren't as many blogs on the SCAL Top 40 list so that wasn't quite as big of a deal, but once I reached #1 there, I stayed in that position all day and night!  That was pretty cool! 


LOOK!  I even passed and stayed ahead of Joy and Melanie from Everyday Cricut for a couple of hours!!! You know I just had to take a picture of that for bragging rights!  hee hee

Here I am at #1 on the SCAL Top 40!  Wahooo...look....#1 Disney Dreamer Designs!


In the past 48 hours I have gained 178 followers!  178!!!  Unbelievable!   Saturday I also had the most visitors to my blog in one day than ever before with 1294!  That is half of what I did the ENTIRE MONTH of February!  The numbers just amaze me and I have all of you to thank for that!  So...  THANK YOU! 

Now for an exciting announcement...


It didn't take much for Shawn and I to decide that we need to do this again!  There was so much interest and we have a waiting list of crafters who are anxious to participate as a blog hop stop!  We decided that this next one is going to be two days long with different stops on Saturday and Sunday so that we will be able to involve more blogs!  If you are interested in being a blog hop stop on one of our upcoming Disney/Pixar blog hops, please go to http://www.cricutsearch.com/ and click on "contact" to email Shawn.  Please put "Disney/Pixar Blog Hop" in the subject line. 

I will be back later after I get the boys off to school to draw and announce the winners for all of the blog hop candy!  Good luck to everyone who entered!

Also, if you get a chance to stop over to Patches of Pink I would appreciate any support you might want to throw my way for the two projects I have entered in their linking party!  Voting is only open today and the top 3 will be announced tomorrow!   I entered my Nemo layout from the blog hop and the "Have a Tree-mendous Day" card that I posted on the 18th.  Thank you!

Sunday, March 27, 2011

Mickey Mouse head Tie Dyed T-shirts


*****

I get so many questions about and compliments about our Mickey head tie dyed T-shirts that I thought it was about time I share some pictures of the process and some instructions with all of you.  The first thing I do is cut the Mickey heads out using my Mickey Font Cricut cartridge.  There is no rhyme or reason to the size that I cut them.  I usually end up cutting multiple sizes and then place them on the t-shirt to see how it looks and then cut one bigger or smaller depending on how it looks.  I always cut them out of black cardstock so I can see the outline of the paper good through the inside of the t-shirt. 


Once the cut out of the ears is placed inside the shirt and centered where I want it, I just take a pencil and trace around the Mickey. 

I didn't take a picture of the next step in the process because it was kind of hard to take a picture while stitching.  What you will want to use is waxed dental floss as your thread.  It is important that it is waxed.  You will want a good size length of floss threaded into your needle   I don't think it really matters where you start the stitching, but I always start at the bottom of the Mickey head in the middle.  For a clear and well defined Mickey head you will want to keep your stitches pretty tight and close together.  I really wish I had a photo of this step for you so you could see it.  When you get all away around the Mickey head and back where you started you will want to pull on the floss to gather your Mickey head and make it pucker up so it looks like this (below).  Be careful not to pull too hard because you do not want the floss to break.


After you get it popped up from the shirt looking like the picture above you want to take thick rubber band(s) and wrap them tightly at the base of the Mickey head.  It is important that none of the stitched area is under the rubberband.  If stitching area gets wrapped in the rubberband, you will want to pull it out from underneath or you will not get a good border around your Mickey.  On the adult shirts I usually use two rubberbands and on the kids only one.  On the adult shirts the band width is probably about an inch and the kids maybe 1/2-3/4".  It doesn't have to be an exact science...after all, it is your own personal artwork!


Once you have all your shirts stiched, puckered and banded you will want to soak them in soda ash.  I have heard you can purchase this stuff in the laundry aisle at some grocery stores, but I for the life of me have never been able to find it in any around me!  I usually buy a couple boxes of it by Tulip from M's or J's.  I always soak mine overnight. 


Once they are soaked you can squeeze out the excess water and then you want to lay them out on a flat surface with the Mickey head facing up like pictured below.


After you have it all flat with the Mickey head up you want to grab ahold of the Mickey head by the rubberband base and while holding the rest of the shirt still with your other hand you want to start twisting the Mickey head.  You may need to adjust and straighten the shirt during your twisting.


Keep twisting and straightening...


....and twisiting


Basically your end goal when all the twisting and straightening is done is to have it so it looks like a giant cinnamon bun with a Mickey head sticking up out of it like shown below!


Then you want to take thin rubberbands and band the shirt to hold all the edges in the bun form.


Again...no exact science to this, but I usually use 3 rubberbands for the kids sizes and 4 rubberbands for the adult sizes. 


It is important that you keep the Mickey head pulled up and out from underneath the other rubberbands.  I usually put a rubberband around the outer edge of the circle part of the bun as well, but it is not mandatory.  I just like knowing that all is being held in shape during the dying process.


These are the dyes that I used by Dylon and I was very happy with my color results.  I have heard other people say that dyes by Jacquard give a very vibrant color, but I think you can only order those online. 


I used ketchup and mustard containers from the dollar store for my dyes and just wrote on the outside of them what colors they were.  The nozzles on these bottles made it easier to get down inside the folds of the bun which puts more color on the t-shirt.  If you prefer more white to show, do not go as deep into the folds. 


These were the easiest ones I made because they were our black and white shirts.  All it required me to do was squirt it down with black all over! 


The multi-colored ones were a little more complicated.  One this particular one I wanted the Mickey head to be black so I held the shirt upside down with the Mickey head facing down as I carefully squirted the black dye onto it.  Once I got it covered in black ink, I quickly and carefully wrapped it with a piece of plastic wrap and then rubberbanded around the bottom VERY TIGHTLY to hold the plastic in place and keep the black dye from dripping onto the rest of the shirt. Then I just picked part of the shirt to use the yellow dye on (including down in the folds) and the rest I added the red.


I followed the same kind of dying pattern on the bottom side of the bun, still making sure I was getting down inside the folds.


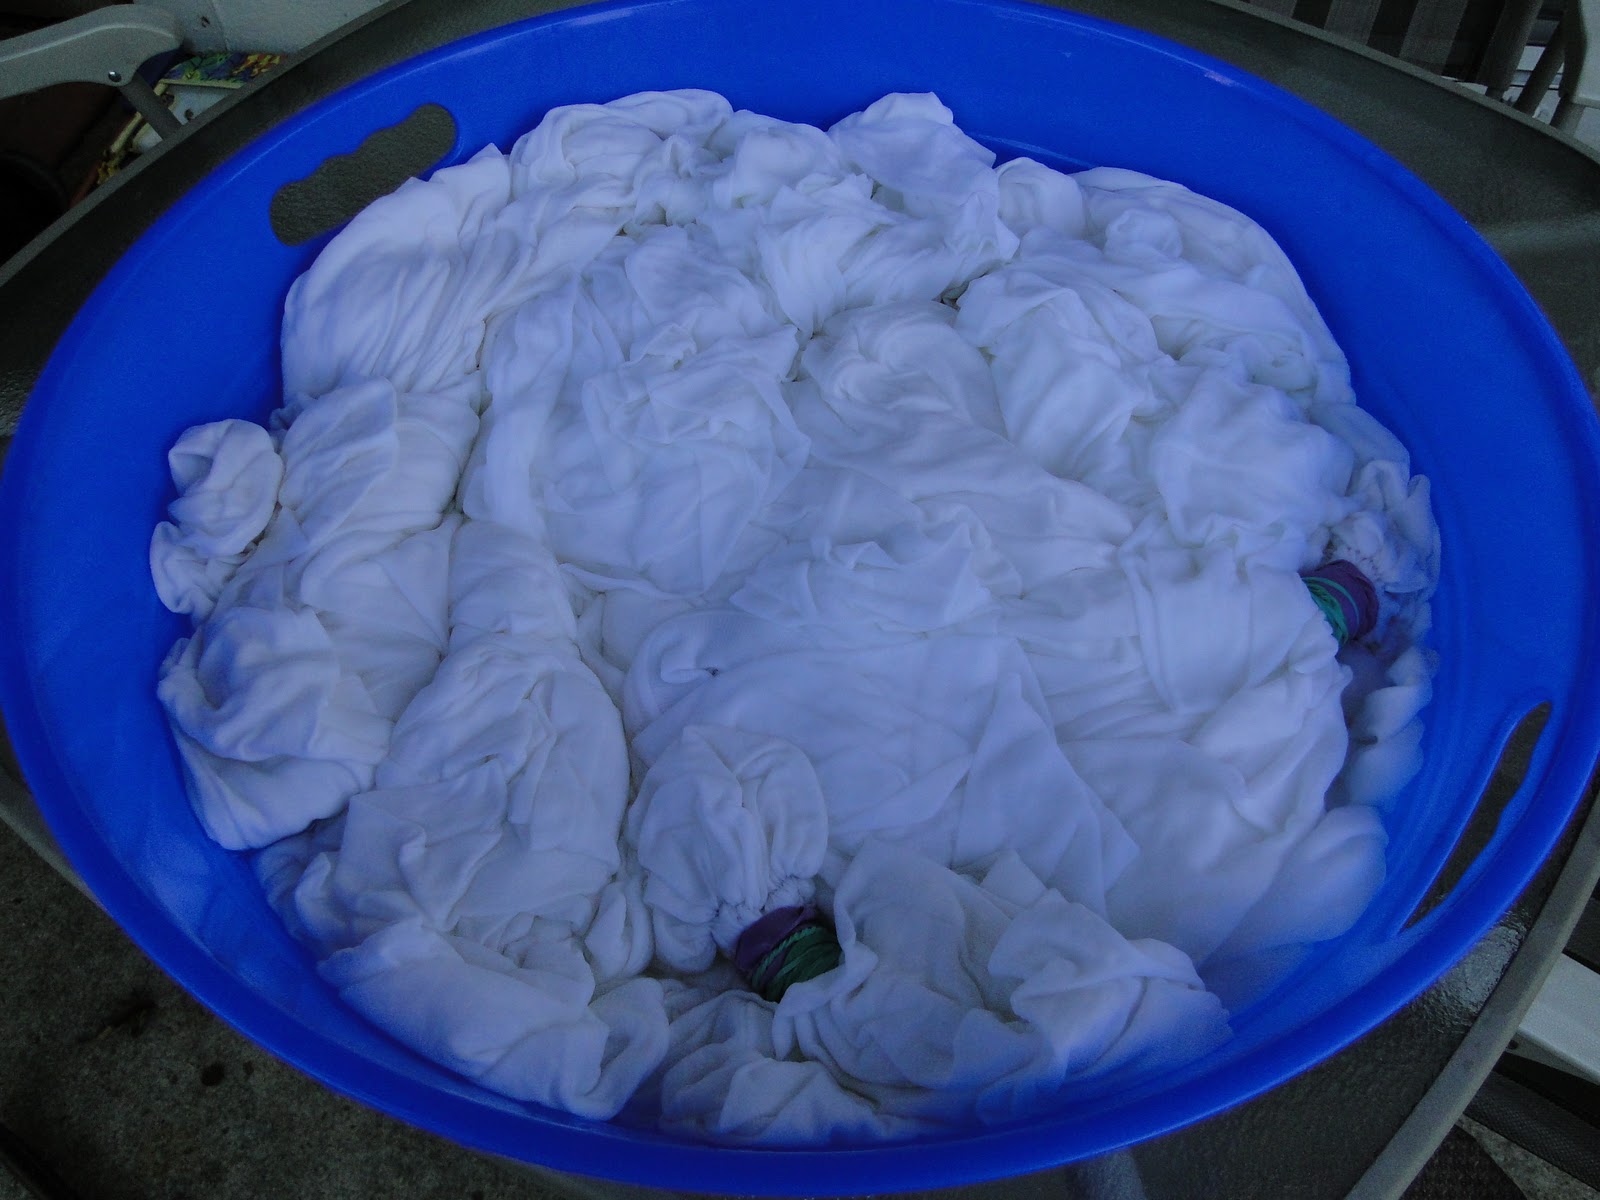
Once I had finished adding the dye I wrapped the entire shirt securely so the dye couldn't drip out onto any of the other shirts and placed them back in the big blue tub.  The longer you let your t-shirts cure and set in the dye before washing...the better.  You will want to give them at least 24 hours, but I usually like to let mine sit for 3 or 4 days. 


Once you've let the dye set for the length of time you choose, you will want to unwrap the first layer of plastic wrap that is covering the entire shirt and rinse it thoroughly in cold running water.  Once the water that is draining is running clear, go ahead and unwrap the Mickey head and rinse that under the running faucet.  Once the entire shirt is rinsed thoroughly you are ready to remove the rubberbands and the stitching!   Your next step is to run them through the washing machine on cold water cycle.  I always wash my like sets of dyed shirts together for the first time without mixing them with the other sets.  I usually do one wash and then run them through again with an old towel.  The old towel will usually pick up any extra dye that isn't set into the material completely.  I also do not put my tie dyed shirts into the dryer.  I always put them onto a hanger and let them air dry. 

Here are some pictures of our shirts that I made for our June 2010 WDW trip.  I really need to get busy soon on some new ones for our trip later this summer! 


I had to share two of our purple and yellow shirts - daytime shot....

...and night! 

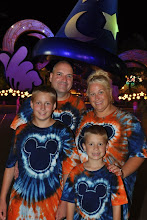
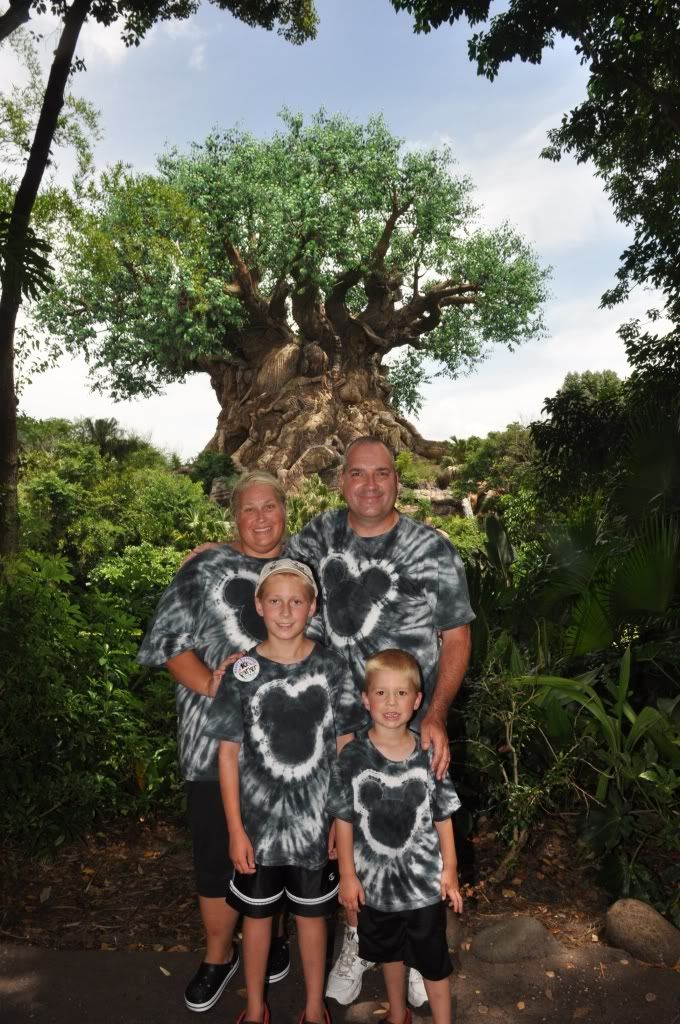
I hated these black and white shirts when I got them rinsed out.  It was a lot more black that I expected or wanted....I wasn't even going to take them with us.  My husband talked me into taking them and I'm so glad he did!!!  This picture of our family in front of the Tree of Life at Disney's Animal Kingdom is one of my all time favorite pictures of us.  Thanks Babe for being the voice of reason (if only this one time!)


I made myself a pink and orange Mickey T!  Pink and orange is my absolute favorite color combo and I didn't think I could talk the boys into it!  lol  I kept it for one of our short park days and let the guys sport their Mickey spangled banner t's!


If I had a dollar for every person that stopped us and asked where we got our shirts I would be a rich woman and if I would have had extra T-shirts with me...I would be even richer!  I loved how proud of our shirts my boys were.  Usually before I could even respond Tanner or Parker would speak up and say "My Mom made them!"  That alone made all the time spent making them well worth it!

I hope you have enjoyed my tutorial.  For those of you who have been asking for so long...thank you for your patience, hope it was worth the wait!  If you end up making some of you own, make sure to stop back by and let me know!  I would love to see how yours turn out!  Have a magical day!

Related Posts Plugin for WordPress, Blogger...